This is a post that I am writing to accompany an episode of All Through A Lens Podcast in which I am interviewed. If you listen to that episode (episode #28) and are looking for some images to accompany, this post is for you.
I am told that the freely available version of the interview runs about 14 minutes. The longer version runs a full hour. If you are interested in the full interview, you need to subscribe to the All Through A Lens Patreon. I recommend you do this anyway, as it helps support the project and its people. While you’re at it, you should subscribe to my Patreon. Most of the images I am sharing here also appeared in a post on my Patreon from August 15, 2020. I have made that post available without a subscription if you are interested. I have been terrible at promoting it, but I am using it more and more as the place where I share new work, and I will be offering all sorts of special deals on prints, workshops, zines/books, and more to my subscribers. (There, self-promo done. Thanks for not bailing on me.)
I’ll also mention that Vania did a review of my zine “Paris Syndrome” back in Episode 10.
Since this is intended to accompany that interview, I am going to let you go listen to it and not try to write a long explanation of everything. Go listen to the episode, and if you haven’t subscribed, do. I like these two and have been a regular listener to their podcast since it’s beginning. It captures the spirit of adventure and learning that drives my photography. If you’re a film photographer and you are looking for a way to learn more, start with All Through A Lens.
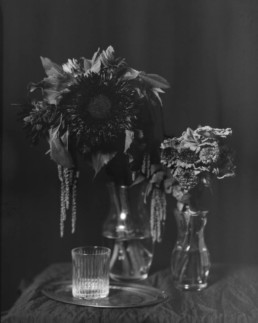
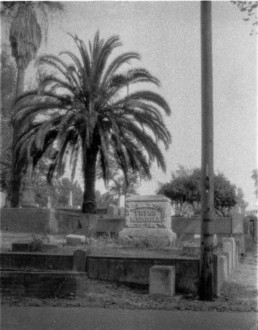
I reference a series of tests that I did when I first started shooting with UltraCruz Blue X-Ray film. This first image is a really bad still life I shot with a Cambo 8×10 and Schneider 300mm f/5.6 lens as my first exposure with this specific film. I set it up with a few things I had on hand that gave me good shadow areas, textures, a range of colors, from dark to light, with emphasis on yellow & red, and I put the whiskey glass in because it threw some interesting light on the cut-glass.
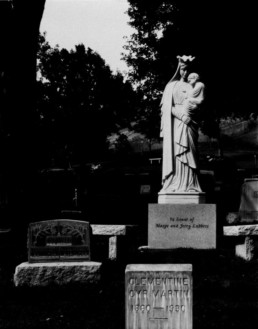
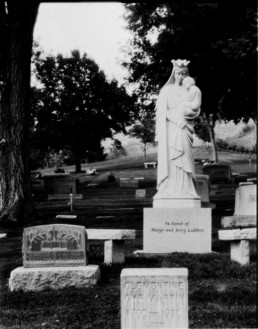
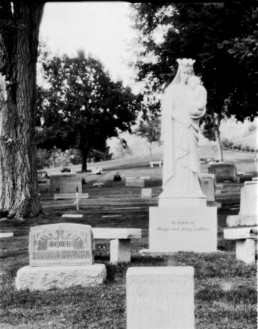
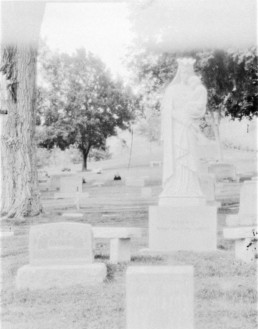
The above image was shot at ISO 100 and tray developed in Rodinal 1+100, which was a decent starting point, but no sooner than I had hung the negative to dry, I realized I needed to do some more thoughtful testing. So I cut 4 8×10 sheets down to 4×5 and loaded those 16 sheets into 4×5 holders. I labeled pairs of holders so I had 2 sheets to shoot at ISO 3, 6, 12, 25, 50, 100, 200 (and I had two sheets reserved for reshoots because I generally make one or two stupid mistakes). I set out to a cemetery and found a couple of scenes to shoot. Here are 4 images from 7 shots in a series that best demonstrate the differences in sensitivity rating. (They are left-to-right ISO 12, ISO 25, ISO 50, and ISO 100.)
Based on this test, I determined that the best results were between ISO 25 and 50, and that is where I initially started shooting outdoors, at ISO 25. I have since modified that to ISO 50 as my general starting point. My standard development at ISO 50 has been 7 min tray development in Rodinal 1+100 with constant gentle agitation (gentle because these negatives scratch if you look at them wrong so you want to avoid as much surface contact with tray bottoms as you can.) I always do a 4 min pre-soak in distilled water before development. For ISO 25, I often develop for 9 minutes, especially if the scene is low contrast. I still will shoot the film at ISO 25 in certain higher-contrast mixed light situations, but generally prefer ISO 50 for most everything else in natural light. It renders better in the midtones than ISO 25. My advice for anyone starting is to do a similar series of tests, from ISO 6 (ISO 3 is a waste of a sheet of film) to ISO 100. I think you’ll find the 12, 25 and 50 ISO results are the most instructive and give you the best feel for how the film can be handled for different conditions.
The key to X-Ray is to harness one or more of the qualities it best enhances. In general, the negatives have a reasonably short value scale (about 5 stops from total black to white), deep shadows and easily blown-out highlights, and in full sun a tendency to be incredibly grainy. This is the film that I was referring to when I started using the “Whole Grain Film” tag, and for good reason.
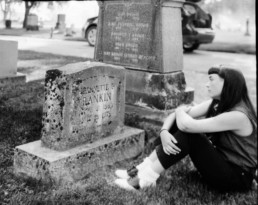
Below are a few more images showing the three qualities I mentioned above 1. Short value range scale: I wouldn’t waste a lot of time with traditional 10 stop scales when shooting this film. Try a scale of 5 stops from deep black to total white instead and you’ll be closer. 2. Beautifully smooth and dense shadows — this is in part due to the emulsion on both sides of the film. 3. Whole Grain. Grab a napkin, this is a crumbly bran muffin of a photograph. This is what full desert sun looks like. 4. The last image is a nice compromise showing grain and density of shadow which I have come to adore about X-ray film. This image, though taken in a Sacramento, CA cemetery makes me think of the stories of Paul Bowles about Tangiers. 5. Finally, this is a portrait of my daughter at the grave of Jeanette Rankin. It was shot with a Cambo 8×10 in shade
The images below are:
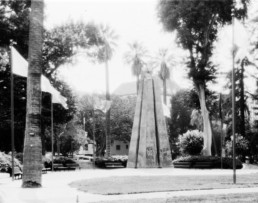
- “Purple Heart Monument” taken in strong morning light at California State Capitol Park, Sacramento.
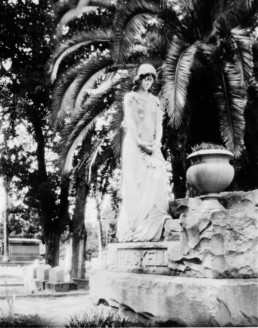
- “Mr. Haskell’s Eternal Dream In Blue” taken in Historic Sacramento Cemetery, Sacramento, CA
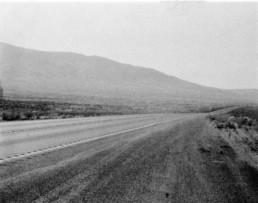
- “Blue Mountain Post Apocalypse” taken in full-midday sun on the top of Blue Mountain Pass, about 4 miles north of the town of McDermitt, NV in Southeastern Oregon.
- “Sacramento hints of old Tangiers” taken in Historic Sacramento Cemetery, Sacramento, CA
- “Lucia at Jeanette Rankin’s Grave” 100 years after Women got the right to vote. Cambo 8×10 monorail camera Schneider 300mm f/5.6 lens. 8×10 UltraCruz Blue X-Ray Film at ISO 100 tray developed in Rodinal 1+100 for 9 minutes. Missoula County Cemetery, August 2020 Missoula, MT

